
深度学习笔记-MNN上位机编译
笔者最近在研究深度学习相关的框架,第一个目标便是 MNN 。MNN(Mobile Neural Network)是阿里巴巴集团开源的轻量级深度学习推理框架,具有良好的多端支持,使用 C++11 构建。
我们今天使用的是MNN-3.2.0,上位机环境如下:
- 操作系统:NixOS 25.11 (x86_64, Linux 6.16.9)
- 编译器:GCC 13.4.0, NVCC 12.8
- CMake:3.31.7
因为 GCC14 的标准库使用了 NVCC 不支持的语法,因此笔者使用了 GCC13 ,根据官方文档,可以使用 GCC>=4.9 或者 Clang 。
构建流程
预先准备
按照官方文档,我们需要先生成 MNN Schema :
./schema/generate.sh这里需要注意,如果你的环境不是标准的 FHS 环境,那么 MNN 所有的脚本都会失败,你需要将脚本开头的#!/usr/bin/bash替换成你的解释器路径,或者使用#!/usr/bin/env bash。
官方文档中还有一步,调用./tools/script/get_model.sh获取模型,但该脚本需要先编译 MNN Converter ,因此我们暂且搁置。
编译
创建一个build目录并进入,使用cmake进行构建:
mkdir build && cd build
cmake -DMNN_CUDA=ON \
    -DMNN_AVX512=ON \
    -DMNN_BUILD_TEST=ON \
    -DMNN_BUILD_DEMO=ON \
    -DMNN_BUILD_CONVERTER=ON \
    -DCMAKE_BUILD_TYPE=Debug \
    -DCMAKE_EXPORT_COMPILE_COMMANDS=ON \
    ..
以上 FLAGS 代表:
MNN_CUDA:使用 CUDA 后端MNN_AVX512:使用 AVX512 指令MNN_BUILD_TEST:构建测试MNN_BUILD_DEMO:构建样例MNN_BUILD_CONVERTER:构建模型转换器CMAKE_BUILD_TYPE:Debug 模式构建(调试需要)CMAKE_EXPORT_COMPILE_COMMANDS:导出编译数据库( Clangd 需要)
然后,使用make构建:
make -j4因为编译过程非常消耗内存,不建议使用最大并行数编译,笔者的笔记本内存为
16GB+16GB交换区,只能使用-j8以下,否则会导致 KDE 崩溃。
测试
单元测试
在build文件夹中,使用run_test.out进行测试:
./run_test.out

...

TEST_NAME_UNIT: 单元测试
TEST_CASE_AMOUNT_UNIT: {"blocked":0,"failed":2,"passed":348,"skipped":0}
TEST_CASE={"name":"单元测试","failed":2,"passed":348}
这里笔者在 Release 模式下能通过所有的测试,但在 Debug 模式下却有两个测试失败,分别是:
Error: expr/PrearrangeTest
Error: op/ConvInt8/winograd
因为笔者也是小白,解决不了这个问题,好在大部分功能没有出现问题,故而暂时作罢。
简易图像变换
使用pictureRotate.out来进行图像变换:
./pictureRotate.out ../resource/images/cat.jpg 45 image_r45.jpg

size: 480, 360
CPU Group: [ 11  8  6  4  2  14  0  12  9  10  7  5  3  15  1  13 ], 800000 - 4600000
The device supports: i8sdot:0, fp16:0, i8mm: 0, sve2: 0, sme2: 0
输入图片是 MNN 自带的猫图像,转换前:
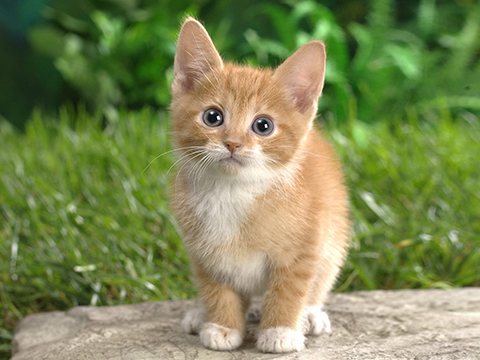
转换后:
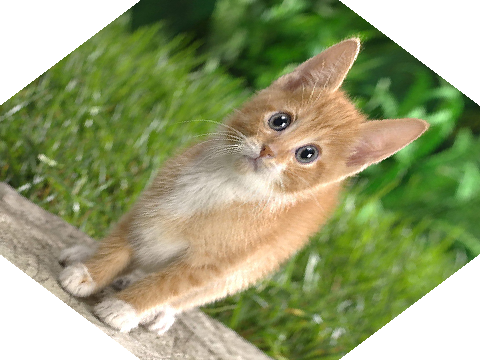
MobileNet 推理
因为我们构建了 MNN Converter ,所以我们可以直接使用 MNN 提供的工具进行模型获取,我们运行:
./tools/script/get_model.sh获取的模型被转换为.mnn格式,保存在项目根目录的resource/model中,我们可以使用构建获得的GetMNNInfo检查模型:
./GetMNNInfo ../resource/model/MobileNet/v2/mobilenet_v2_1.0_224.tflite.mnn

CPU Group: [ 11  8  6  4  2  14  0  12  9  10  7  5  3  15  1  13 ], 800000 - 4600000
The device supports: i8sdot:0, fp16:0, i8mm: 0, sve2: 0, sme2: 0
Model default dimensionFormat is NHWC
Model Inputs:
[ input ]: dimensionFormat: NC4HW4, size: [ 1,3,224,224 ], type is float
Model Outputs:
[ MobilenetV2/Predictions/Reshape_1 ]
Model Version: 3.2.0
Model bizCode: 0000还是使用猫图片,使用mobilenetTest.out进行推理测试:
./mobilenetTest.out ../resource/model/MobileNet/v2/mobilenet_v2_1.0_224.tflite.mnn ../resource/images/cat.jpg 2

model:../resource/model/MobileNet/v2/mobilenet_v2_1.0_224.tflite.mnn, input image:../resource/images/cat.jpg, forwardType:2, precision:1
CPU Group: [ 11  8  6  4  2  14  0  12  9  10  7  5  3  15  1  13 ], 800000 - 4600000
The device supports: i8sdot:0, fp16:0, i8mm: 0, sve2: 0, sme2: 0
main, 90, cost time: 6.300000 ms
output size:1001
282, 0.434767
283, 0.218346
286, 0.173853
288, 0.009451
285, 0.008966
284, 0.006774
739, 0.004715
969, 0.003044
357, 0.002419
905, 0.001989这里参数最后添加了一个2,代表使用 CUDA 推理。
因为模型使用 ImageNet 进行训练,我们对比最高置信度 ID 和 对照表,得到最终预测结果是tiger cat。
简单分析pictureRotate.out
pictureRotate.out的源代码位于根目录的demo/exec/pictureRotate.cpp,其简化源码为:
int main(int argc, const char* argv[]) {
    // Load image
    int width, height, channel;
    auto inputImage = load_img(inputPatch, &width, &height, &channel, 4);

    // Construct Matrix (Trans)
    Matrix trans;
    trans.setScale(1.0 / (width - 1), 1.0 / (height - 1));
    trans.postRotate(-angle, 0.5, 0.5);
    trans.postScale((width - 1), (height - 1));

    // Construct ImageProcess Config
    ImageProcess::Config config;
    config.filterType   = NEAREST;
    config.sourceFormat = RGBA;
    config.destFormat   = RGBA;
    config.wrap         = ZERO;

    // Construct ImageProcess
    std::shared_ptr<ImageProcess> pretreat(ImageProcess::create(config), ImageProcess::destroy);
    pretreat->setMatrix(trans);

    {
        std::shared_ptr<Tensor> wrapTensor(ImageProcess::createImageTensor<uint8_t>(width, height, 4, nullptr), MNN::Tensor::destroy);

        // Operate the conversion
        pretreat->convert((uint8_t*)inputImage, width, height, 0, wrapTensor.get());

        // Write file
        write_img(argv[3], width, height, 4, wrapTensor->host<uint8_t>(), 4 * width);
    }
}
这部分代码的核心逻辑可以用以下步骤概括:
- 创建转换器(
Matrix) - 创建图片预处理器(
ImageProcess) - 执行转换(
pretreat->convert)
我们不进行其他复杂部分的分析,只分析和转换有关的Matrix,Matrix被实现为一个3x3的浮点矩阵,其代表了图像上的所有点的坐标的一次线性变换,初始化时,其会被设置为单位矩阵(不进行变换)。
Matrix中有两族变换函数:
setXXX:将矩阵设置为某个样子,例如setScale是将矩阵设置为单位矩阵放缩后的状态,setIdentity将矩阵设置为单位矩阵。postXXX:将矩阵进行某种变换,该族函数将当前矩阵和新的变换矩阵相乘,相当于在线性变换“列表”中添加一步,比如postRotate就是在当前变换后添加一次旋转变换,在源代码中就是先缩放后旋转。
Matrix还可以使用postConcat方法和其他Matrix进行组合,实际上其他的postXXX方法基本都是通过构建临时矩阵,并使用postConcat实现的。
Nix 开发环境参考
下面是笔者的flake.nix开发环境,仅供参考:
{
  description = "MNN Dev environment";

  inputs = {
    nixpkgs.url = "github:nixos/nixpkgs?ref=nixpkgs-unstable";
    flake-parts.url = "github:hercules-ci/flake-parts";
  };

  outputs =
    { flake-parts, ... }@inputs:
    flake-parts.lib.mkFlake { inherit inputs; } {
      systems = [ "x86_64-linux" ];

      perSystem =
        { pkgs, system, ... }:
        let
          stdenv = pkgs.gcc13Stdenv;

          clang-tools = pkgs.callPackage ./nix/clang-tools.nix {
            inherit stdenv;
          };
        in
        {
          devShells.default =
            pkgs.mkShell.override
              {
                inherit stdenv;
              }
              {
                hardeningDisable = [ "fortify" ];

                buildInputs = with pkgs; [
                  cudaPackages.cudatoolkit
                  cmake
                ];

                packages =
                  (with pkgs; [
                    nixd
                    nixfmt-rfc-style
                  ])
                  ++ [
                    clang-tools
                  ];
              };

          _module.args.pkgs = import inputs.nixpkgs {
            inherit system;
            config = {
              allowUnfree = true;
              cudaSupport = true;
            };
          };
        };
    };
}clang-tools.nix:
{
  stdenv,
  lib,
  runCommand,
  makeWrapper,
  llvmPackages,
  extraQueryDriver ? "",
}:
let
  queryDriver = lib.concatStringsSep "," [
    "${stdenv.cc}/bin/*"
    extraQueryDriver
  ];

  nextPath =
    path:
    let
      subNext = lib.lists.head (lib.attrNames (builtins.readDir path));
    in
    "${path}/${subNext}";

  buildGccInternalInc =
    stdenv:
    let
      baseLib = "${stdenv.cc.cc}/lib/gcc";
    in
    # arch and version
    # because of the inconsistency of derivation version of gcc, there is
    # no way to get the version here
    "${nextPath (nextPath baseLib)}/include";

  buildClangInternalInc = stdenv: "${stdenv.cc}/resource-root/include";

  # once https://github.com/clangd/clangd/issues/2074 is fixed,
  # we can remove these function and use the built-in include path
  buildInternalInc =
    stdenv:
    if stdenv.cc.isGNU then
      buildGccInternalInc stdenv
    else if stdenv.cc.isClang then
      buildClangInternalInc stdenv
    else
      "";
in
runCommand "clang-tools"
  {
    unwrapped = llvmPackages.clang-unwrapped;
    buildInputs = [ makeWrapper ];
  }
  ''
    mkdir -p $out/bin

    for tool in $unwrapped/bin/clang-*; do
      tool=$(basename "$tool")

      if [[ $tool == "clang-cl" || $tool == "clang-cpp" ]]; then
        continue
      fi

      if [[ ! $tool =~ ^clang\-[a-zA-Z_\-]+$ ]]; then
        continue
      fi

      ln -s $unwrapped/bin/$tool $out/bin/$tool
    done

    makeWrapper $unwrapped/bin/clangd $out/bin/clangd \
      --add-flags "--query-driver=${queryDriver}"     \
      --set LANG "en_US.UTF-8"                        \
      --set CPATH "${buildInternalInc stdenv}"
  ''
更新日志
09cd9-于8822e-于